REVISED ASSEMBLY INSTRUCTIONS 

DAW's 23" Fashion Lady Dolls
These instructions and notes were provided courtesy of 
Arlene Dangerfield - Doll Artist

ASSEMBLY INSTRUCTIONS for 
23" Fashion Lady Dolls

When preparing greenware, cut the leg openings from the buttocks to the
top of the flat area indicated on the torso.  Leave the crotch intact.
Cut the arm openings to almost one inch across.  You will need to cut
out under the arm into the torso for the straight arms. 
FABRICS AND SUPPLIES
½ yd. broadcloth----leg/arm tubes
6 inch flexible appliance tubing (half inch exterior measurement)
12 inch long piece of  1/4 inch dowel (or stuffing stick)
Tape
Polyfil
Hot glue gun
Two 23 inch lengths of #12 Romex electrical wire
22-gauge floral wire (green wire on paddle)
20mm shoulderplate connector
Felt or mole skin for the head/body contact area
Needle nose pliers
Hemostats (surgical clamping forceps)
BODY CONSTRUCTION
 1.      Sew 1/4 inch casings on each end of the arm/leg tubes.
       2.      Fold tubes on the fold line, and sew the tube seam starting
and stopping at the dots.  Backstitch at the 
beginning and end of the seams.
3.    Turn tubes right side out.
DOLL ASSEMBLY
After setting eyes and lashes, glue a piece of felt or moleskin to the
neck area of the torso, leaving a hole to attach the connector.  Attach
head using shoulderplate connector.  To do this, run a double length of
dental floss or heavy thread through the loop on the connector; drop
ends of the thread through the top of the head, through the neck, and
down through the torso, exiting through a leg opening.  Pull the threads
tight, drawing down the shoulderplate loop.  Using the pliers or
hemostat, insert the cotter pin through the armhole into the loop.
Remove cord.
Take the appliance tubing and insert the dowel through it.  This is to
keep the tube straight and from getting flattened while stuffing the
leg.  Place the tube inside the leg with the hole in the sole, making
sure to keep it centered, and hot glue in place.   It may be easier to
run a quantity of hot glue inside the hole from the outside, and then
place the tube in the leg.   Allow the tube to protrude from the sole if
the hole is large enough.  Keeping the dowel inside the tube, take one
piece of the Romex wire and run it down the leg as far as it will go.
Keeping both tube and wire centered, stuff polyfil firmly to the top of
the leg.  Take the second piece of Romex and insert all the way into the
other leg.   You will need to bend it to conform to the leg shape.  Keep
it centered and stuff firmly with polyfil.  Wrap each leg with bubble
wrap or socks to keep them from banging together while assembling the
body.   Run a doubled length of floral wire through each arm and leg
casing, leaving enough extra at each end to make about a half inch long
twisted tail when the porcelain is attached.  Attach the legs to the
casings, making sure that the opening in the fabric is to the back of
the leg.  Twist the wire ends snuggly, using the needle nose pliers.
Cut the twisted end to about ½ inch long and tuck up over the top of the
leg.   Pull the body tube up over the wire as far as it will go, and
wrap a piece of tape around it to hold in place while inserting it into
the torso.  Insert the Romex from the left leg through the torso and out
through the right armhole.   Insert the right leg wire through the torso
and out the left armhole, so that the wires cross inside the torso.
Remove the tape.  Insert the arm wire inside each arm as far as it will
go,  and check length.  The arm should fit the cloth without being
either too tight or too loose.  If length is correct, put a bit of hot
glue inside the arm and insert the Romex.  Fill remaining space in the
porcelain with polyfil, then attach the arm to the cloth tube.  Twist
the wire and tuck it inside the porcelain like you did with the legs.
Using the stuffing stick or hemostat, stuff the cloth portion of the
arm, down inside the top of the torso as much as you can.   Stuff arms
before doing the legs, or it will be very difficult to do so, especially
with the full length arm.   Stitch up the arm opening.  Using the
hemostat or stuffing tool, push as much polyfil as you can up into the
torso through the leg openings until the body is firm and the leg
openings are full.  Stitch up the leg openings.   If there is an
unfinished edge where the wire attachment is, cover with flat ¼ inch
lace or other trim.  Your doll is now ready to place on a stand.  If
there is tubing projecting from the foot, trim flat with the shoe sole
using an exacto knife of other sharp blade.  Wooden stands should be
about 8 inches in diameter.  Drill the hole for a ¼ inch dowel.  Make it
off center so the doll will be centered on the stand when finished.  You
can place the doll on the base to determine where you want her to stand,
and mark the drilling spot with a pencil. 

These instructions, picture. and photo was  provided courtesy of 
Arlene Dangerfield - Doll Artist

.


These instructions and notes were provided courtesy of 
Linda Plaskett of Doll Creations
 

REVISED ASSEMBLY INSTRUCTIONS

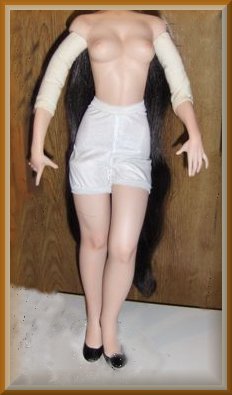
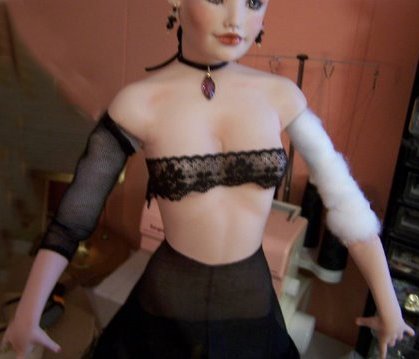
Doll Artworks 23 inch fashion dolls


GREENWARE PREPARATION
When preparing greenware, cut the leg openings from the buttocks to the top of the flat area indicated on the torso.  Leave the crotch intact.  Cut the arm openings to almost one inch across.  You will need to cut out under the arm into the torso for the straight arms.  Also, if you are the person pouring the doll, it is a good idea to add a roll of wet clay around the inside of the arms and legs where the groove line is, while the greenware is still damp.  The grooves are shallow on these dolls, and if you don’t make a deep enough groove, the porcelain wants to slip out of the cloth attachment.  If you wish to have the invisible support, cut a 3/8 inch diameter hole in the sole of the straight leg. 

FABRICS AND SUPPLIES
½ yd. broadcloth----leg/arm tubes
6 inch flexible appliance tubing (half inch exterior measurement)
12 inch long piece of  1/4 inch dowel (or stuffing stick)
tape
Polyfil
Hot glue gun
Two 23 inch lengths of #12 Romex electrical wire
22-gauge floral wire (green wire on paddle)
20mm shoulderplate connector
Felt or mole skin for the head/body contact area
Needle nose pliers
Hemostats (surgical clamping forceps)

BODY CONSTRUCTION
1.  Sew 1/4 inch casings on each end of the arm/leg tubes.
2.  Fold tubes on the fold line, and sew the tube seam starting and stopping at the dots. 
     Backstitch at the beginning and end of the seams.
3.  Turn tubes right side out.

DOLL ASSEMBLY
After setting eyes and lashes, glue a piece of felt or moleskin to the neck area of the torso, leaving a hole to attach the connector.  Attach head using shoulderplate connector.  To do this, run a double length of dental floss or heavy thread through the loop on the connector; drop ends of the thread through the top of the head, through the neck, and down through the torso, exiting through a leg opening.  Pull the threads tight, drawing down the shoulderplate loop.  Using the pliers or hemostat, insert the cotter pin through the armhole into the loop.   Remove cord.
Take the appliance tubing and insert the dowel through it.  This is to keep the tube straight and from getting flattened while stuffing the leg.  Place the tube inside the leg with the hole in the sole, making sure to keep it centered, and hot glue in place.   It may be easier to run a quantity of hot glue inside the hole from the outside, and then place the tube in the leg.   Allow the tube to protrude from the sole if the hole is large enough.  Keeping the dowel inside the tube, take one piece of the Romex wire and run it down the leg as far as it will go.  Keeping both tube and wire centered, stuff polyfil firmly to the top of the leg.  Take the second piece of Romex and insert all the way into the other leg.   You will need to bend it to conform to the leg shape.  Keep it centered and stuff firmly with polyfil.  Wrap each leg with bubble wrap or socks to keep them from banging together while assembling the body.   Run a doubled length of floral wire through each arm and leg casing, leaving enough extra at each end to make about a half inch long twisted tail when the porcelain is attached.  Attach the legs to the casings, making sure that the opening in the fabric is to the back of the leg.  Twist the wire ends snuggly, using the needle nose pliers.  Cut the twisted end to about ½ inch long and tuck up over the top of the leg.   Pull the body tube up over the wire as far as it will go, and wrap a piece of tape around it to hold in place while inserting it into the torso.  Insert the Romex from the left leg through the torso and out through the right armhole.   Insert the right leg wire through the torso and out the left armhole, so that the wires cross inside the torso.  Remove the tape.  Insert the arm wire inside each arm as far as it will go,  and check length.  The arm should fit the cloth without being either too tight or too loose.  If length is correct, put a bit of hot glue inside the arm and insert the Romex.  Fill remaining space in the porcelain with polyfil, and then attach the arm to the cloth tube.  Twist the wire and tuck it inside the porcelain like you did with the legs.   Using the stuffing stick or hemostat, stuff the cloth portion of the arm, down inside the top of the torso as much as you can.   Stuff arms before doing the legs, or it will be very difficult to do so, especially with the full length arm.   Stitch up the arm opening.  Using the hemostat or stuffing tool, push as much polyfil as you can up into the torso through the leg openings until the body is firm and the leg openings are full.  Stitch up the leg openings.   If there is an unfinished edge where the wire attachment is, cover with flat ¼ inch lace or other trim.  Your doll is now ready to place on a stand.  If there is tubing projecting from the foot, trim flat with the shoe sole using an exacto knife of other sharp blade.  Wooden stands should be about 8 inches in diameter.  Drill the hole for a ¼ inch dowel.  Make it off center so the doll will be centered on the stand when finished.  You can place the doll on the base to determine where you want her to stand, and mark the drilling spot with a pencil. 

.
These instructions and notes were provided courtesy of Linda Plaskett of Doll Creations


Other version of:
Hope's Torso, Arms, & Legs Assembled

.
Hope Torso, Pin-Up Arms, & Hope Legs Assembled

.
Links to Individual Pages for:
23" Fashion Lady Dolls
Chari
Grace
Hillary
Hope
Jennifer
Linda
Lorelei
Margarita
Marla
Millie
Morgan La Fey
Pearl
Pin Up Girl
Sirena
Tracy
Willow
 

To Return to previous page hit your:
BACK BROWSER
.
Revised: March,2012